

How to Set Up Your MOLLE Gear for Maximum Functionality
A practical guide to building a MOLLE loadout that stays secure, feels balanced, and actually works when the game starts.
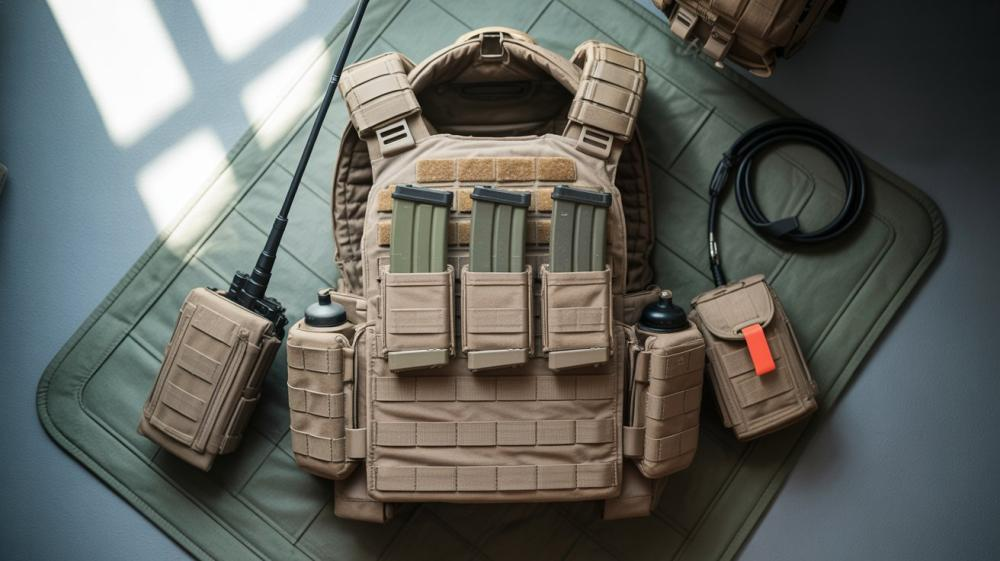
A fully configured MOLLE plate carrier: three rifle mags on the workstation, radio on the support side, IFAK visibly marked, and utilities balanced across the cummerbund. Image: Shogun.shop
If your pouches flop around, magazines fall out mid-sprint, or you keep fumbling for the right gear during a firefight, the problem usually isn't your kit. It's the setup. MOLLE gives you near-infinite flexibility, but you only get that benefit when you weave correctly, place pouches by priority, and balance weight around your body. This guide walks through every step, from the webbing specs most players never learn, to the four zones that should dictate where every single pouch lives.
| Step | What to Do | Why It Matters |
|---|---|---|
| 1 | Pick the right platform (chest rig, plate carrier, or belt) | Everything else depends on this chassis |
| 2 | Plan the layout before weaving anything | Re-weaving pouches takes 10× longer than dry-fitting first |
| 3 | Weave straps through BOTH the platform and pouch webbing | The single biggest cause of pouches flying off |
| 4 | Place pouches by priority zone, not by looks | Muscle memory needs consistent, reachable placement |
| 5 | Balance weight low and central | Reduces fatigue, improves prone shooting |
| 6 | Test with dry drills at home before game day | Finds clashes and snags before they cost you the round |
What's in this guide
- What MOLLE Actually Is (and Why the Specs Matter)
- Step 1: Start With the Right Platform
- Step 2: Plan Your Layout Before Touching Webbing
- Step 3: The Weaving Technique Most Players Get Wrong
- Step 4: Zone-Based Pouch Placement
- Step 5: Weight Distribution and Balance
- Loadout Blueprints by Playstyle
- Common Mistakes That Ruin a Good Setup
- Maintenance and Inspection
- Frequently Asked Questions
What MOLLE Actually Is (and Why the Specs Matter)
MOLLE stands for Modular Lightweight Load-carrying Equipment. The system was developed for the U.S. military in the 1990s as the successor to older ALICE-based load-carrying equipment, and it later became the benchmark for modular tactical and airsoft kit. The part you actually attach pouches to is technically called PALS, short for Pouch Attachment Ladder System, but in practice most players and most brands simply say "MOLLE" for both.
Knowing the specs helps. Standard PALS webbing uses one-inch-wide rows, with roughly one-inch spacing between rows and attachment channels around 1.5 inches wide. In plain English, pouches from different brands usually work together as long as they actually follow the PALS standard. When a pouch feels loose or awkward, it's almost always the way it has been mounted, not a brand mismatch.
If you're mixing pouches from different brands, for example a Warrior Assault placard with Condor utility pouches and an 8Fields dump pouch, the PALS standard means they'll all play nicely with your vest. Don't overthink compatibility. Focus on getting the weave right.
Military and commercial gear vary in materials and stiffness, but for airsoft the most practical difference isn't a headline strength figure. It's build quality. Well-stitched rows, decent edge finishing, and straps that weave tightly matter far more in use than marketing claims about denier or load ratings. Even affordable airsoft gear can work well if the stitching is clean and the pouch is mounted correctly.
One modern variant worth knowing about is the laser-cut panel. Instead of separate rows of sewn webbing, the attachment slots are cut into a laminate panel. The result is usually a slimmer, lighter-looking carrier with less bulk on the outside. Most laser-cut platforms still accept standard MOLLE/PALS pouches, although tolerances can feel a little tighter than on traditional sewn webbing.
Step 1: Start With the Right Platform
Your platform, whether that's a chest rig, plate carrier, or battle belt, is the chassis everything else hangs off. Get this wrong and no amount of clever pouch placement will save you. Before buying or committing to a setup, match the platform to how you actually play.
| Platform | Best For | Typical Capacity | Trade-offs |
|---|---|---|---|
| Micro chest rig | CQB, fast skirmish, hot weather | 3–4 rifle mags + small admin | Minimal carrying capacity |
| Full chest rig | Woodland, moderate MilSim | 5–6 rifle mags + utilities | Chest-heavy, can dig into shoulders under load |
| Plate carrier | MilSim, role-play, structured events | 6+ mags, radio, IFAK, hydration | Heavier, hotter, more setup required |
| Battle belt | Minimalist, mobile, CQB combos | 3–4 mags, dump pouch, sidearm | Weight on hips; less front real estate |
| Chest rig + belt combo | MilSim-lite, long woodland days | Rifle mags up top, utilities + pistol on belt | Best of both, but two platforms to buy |
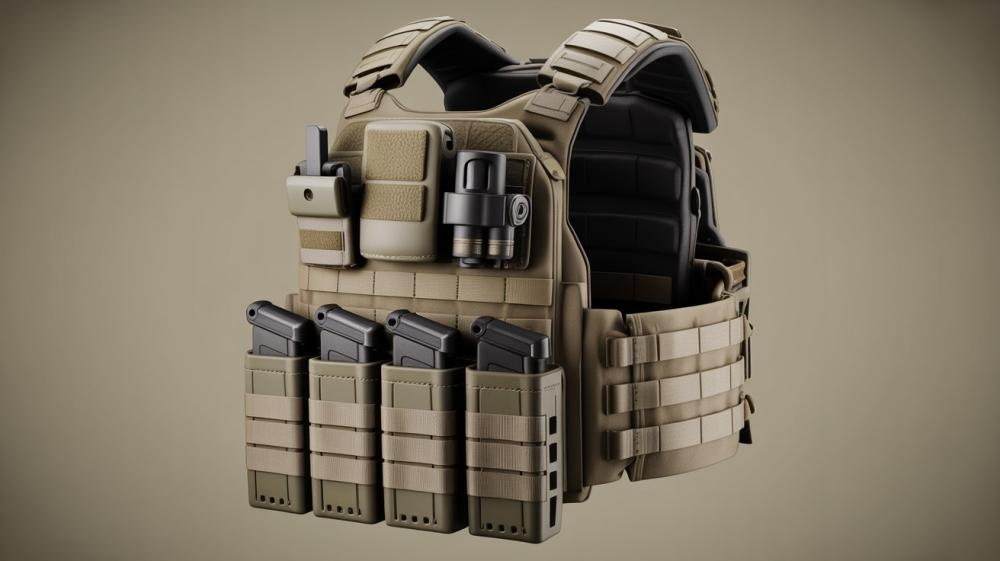
A quick reality check: the most common mistake beginners make is buying a full plate carrier because it looks impressive, then wondering why they're exhausted after two rounds. If you play three-hour walk-on days at a local field and never run more than four magazines, a chest rig is genuinely a better choice. Save a proper plate carrier like the Invader Gear 6094A-RS for events where you actually need six mags, a radio, and an IFAK on you at all times.
Whichever platform you pick, check three things before you start weaving anything onto it:
- Fit. Can you cinch the cummerbund or harness snug without restricting your breathing or shoulder movement? Adjust the shoulder straps first, because they set the ride height. Then tighten the sides. In airsoft, the carrier should sit high and stable on the torso rather than hanging low over your stomach or bouncing when you run.
- Webbing quality. Flexy, thin webbing sags under load and makes weaving miserable. Stiffer webbing holds its shape and keeps pouches locked in. Quick test: grab two adjacent rows and try to twist them. If they deform easily, the pouch will too.
- PALS coverage. More isn't always better. A cluttered chest rig with every row used tends to feel noisy and heavy. You want enough webbing to mount what you'll actually carry, with a bit of room to reconfigure later.
Step 2: Plan Your Layout Before Touching Webbing
This is the step almost everyone skips, and it's the reason you'll end up re-weaving pouches three or four times. Before any strap touches any webbing, lay everything out on a table. Vest, pouches, magazines, IFAK, dump pouch, radio, hydration, all of it. Then dry-fit the pouches into roughly the positions you want without weaving. Walk around with the vest on. Reach for each pouch with your eyes closed.
Two things to confirm before committing:
- Can I reach every primary pouch with my non-dominant (support) hand? Your dominant hand stays on the rifle. Your support hand does the reloading. If a magazine pouch can't be reached quickly with the off-hand, it's in the wrong place.
- Does anything clash? Magazine pouches competing with a radio's PTT cable, a holster digging into a thigh pouch, an admin pouch flap covering a mag. These clashes only show up when you physically try the setup.
A simple trick is to use a sheet of cardboard cut to the rough size of your front panel. Place the pouches on it in the order you want, trace the outline, then transfer that layout to the vest. It sounds excessive until it saves you from re-weaving half your kit the night before a game day.
While planning, apply a three-tier priority system. Every piece of gear gets sorted into one of three categories:
Tier 1, life-critical, needed in seconds. Rifle magazines, IFAK (for yourself, even if a teammate applies it), dump pouch. These go in the fastest-access positions.
Tier 2, mission-critical, needed in a lull. Pistol magazines, radio, admin pouch, pyro. Accessible but not prime real estate.
Tier 3, nice to have, rare access. Hydration, spare batteries, snacks, tools, backup gear. These go on the back or lower sides where you'll only reach during breaks.
Sorting before mounting means when you're actually weaving, every decision is already made.
Step 3: The Weaving Technique Most Players Get Wrong
This is the section most guides gloss over, and it's where the majority of MOLLE failures happen. A properly woven pouch should feel locked in. Grab it and shake, and it shouldn't move independently from the vest. A badly woven pouch wobbles, sags, and eventually detaches at the worst possible time.
The principle is simple but almost universally misunderstood: the strap must weave through both the pouch's webbing AND the platform's webbing, alternating between them on every single row. If the strap only passes through the platform, the pouch is hanging on by snaps alone and will rip off under load.
The correct weave, step by step
- Line up the rows. Place the pouch's back panel against the platform so the PALS rows on both are aligned. The pouch's webbing should sit between the platform's rows, not on top of them.
- Start at the top. Take the pouch's attachment strap and feed it down through the top row of the platform's webbing, from outside to inside.
- Through the pouch. Bring the strap back out through the first row of the pouch's own webbing.
- Back through the platform. Feed the strap down through the next row of the platform's webbing.
- Back through the pouch. Out through the next row of the pouch's webbing.
- Repeat all the way down. Alternate over-and-under until you reach the bottom of the strap. Don't skip any rows.
- Secure the snap or tuck. Fasten whatever closure the strap has at the bottom, whether that's a snap button, hook-and-loop, or tuck-tab.
The quickest way to test you did it right: grab the pouch and pull hard outward. If it moves more than a few millimetres away from the vest, you missed a row or didn't weave through the pouch webbing on every pass. Re-do it.
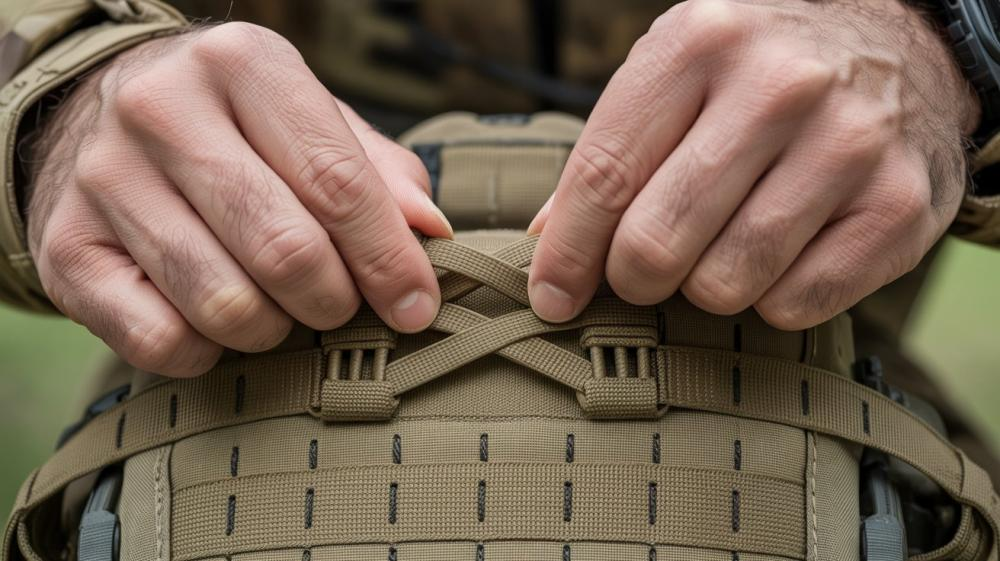
Threading the strap down through the platform's webbing, snapping it at the bottom, and calling it done. This looks correct from the front but the pouch is only anchored at two points instead of four or six. A hard snag on a branch, a doorframe, or a teammate's gear will pull the pouch off. I've seen it happen in MilSims at the worst possible moments. Always weave through both.
MALICE clips, SlickSticks, and alternatives
Not every pouch uses sewn-in straps. MALICE clips (by Tactical Tailor) are rigid polymer clips that lock into the webbing and need a screwdriver to remove. They're great for pouches you never plan to move. SlickSticks (by 5.11) are stiff straps with a snap that pull free quickly. Whiskey Two-Four WTFix straps are low-profile Hypalon alternatives that weave easily and grip by friction.
All of them follow the same principle: weave through both surfaces. A MALICE clip that's only locked into the platform but hasn't passed through the pouch's webbing is just a plastic tab waiting to pop off.
Step 4: Zone-Based Pouch Placement
Once you can weave properly, the next question is where everything goes. Generic advice like "put mags in front" is a good start, but a real setup divides the vest into zones and assigns gear by priority.
| Zone | Ideal Contents | Why Here |
|---|---|---|
| Front centre, upper chest | Admin pouch, radio (PTT), small tools | Above the mag line, doesn't block reloads, easy to see |
| Front centre, mid-chest | Primary rifle magazines (3–4) | Fastest support-hand reach; the "workstation" |
| Front lower / dangler | Frequently-used small items (GPS, map, BBs) | Accessible but doesn't interfere with rifle mounting |
| Cummerbund, strong side | Secondary mags, utility, pyro | Backup reloads without cluttering front |
| Cummerbund, support side | Radio body, dump pouch, spare battery | Balances weight with opposite side |
| Back, upper | Hydration bladder, teammate-accessible IFAK | Out of your way; buddy can treat you without rolling you |
| Back, lower | Sustainment pouch, spare batteries, snacks | Low priority; accessed during breaks |
| Belt (if worn) | Pistol, pistol mags, dump pouch, dedicated tools | Frees chest real estate, distributes weight to hips |
The "workstation" principle
The front of your chest is your workstation, the space where both hands naturally meet when you bring the rifle up. That's where your primary magazines live, because every reload needs to happen in the fastest possible space. Three mag pouches side-by-side on the front panel is the standard airsoft layout for a reason: it's reachable, visible, and consistent.
Which side for the mags, strong or support? The answer is support side, favouring the centre. Your support hand pulls the magazine while the dominant hand stays on the grip. Push the pouches slightly toward your support-hand side so the reach feels natural.
The support-hand test
A drill that shortcuts weeks of trial and error: put the vest on, close your eyes, and reach for each pouch with only your support hand. If you have to look, or if your hand hunts for it, the pouch is in the wrong place. Move it before you ever hit the field.
Don't mount your own IFAK where only you can reach it. If you're down and can't move, a teammate needs to access your medical gear fast. The standard placement is either the lower back or the support-side cummerbund, visible, reachable, and marked with a red tab or patch so it's obvious even to someone who's never seen your kit before.
Step 5: Weight Distribution and Balance
A well-laid-out vest that's front-heavy will still wreck your day. Weight distribution is the difference between a rig you can wear for six hours and one you're desperate to ditch after ninety minutes. Two rules matter here.
Rule 1: Keep heavy items low and central. The closer weight sits to your centre of gravity, the less your body has to fight it all day. Water, loaded magazines, and radio weight become much more noticeable once a game runs longer than expected. When possible, keep the heaviest items close to the torso and avoid stacking too much bulk high on the chest or shoulders.
Rule 2: Balance left and right. Four pouches on the front panel plus a radio on the left cummerbund but nothing on the right means every step pulls you sideways. Match weight across the centreline: if the left cummerbund holds a radio, put a utility pouch or two pistol mags on the right. It doesn't need to be perfect (within a few hundred grams is fine), but a visibly lopsided rig will cause hip and back pain within an hour.
The prone test
Lie down in your full kit on the floor and shoulder your rifle. If you can't get comfortably flat, the front is too loaded. If your magazines dig into the floor and push the rifle up off your shoulder, you've got too much stacked on the front panel. Move one or two pouches to the cummerbund. Snipers and DMR players especially need a clean front for proper prone positioning.
Don't forget the cummerbund
The cummerbund isn't just a strap to hold the carrier closed. It's prime real estate for mag pouches, utilities, and radios. Using both cummerbund sides for gear frees the front panel for essentials and dramatically improves balance. This is one of the easiest upgrades a beginner can make to a beginner setup.
Loadout Blueprints by Playstyle
How those principles translate into actual setups for the four most common airsoft roles.
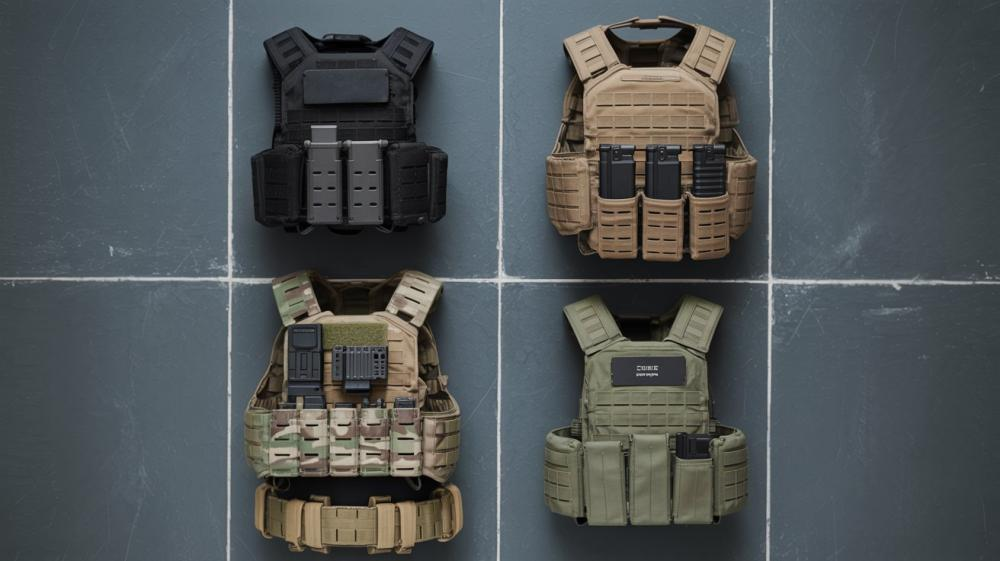
CQB / Speedsoft
CQB rounds are short, fast, and tight. Excess gear snags on doorframes. A micro chest rig or battle-belt-only setup is ideal.
- Front: 3 open-top rifle mag pouches, centred, with active retention (shock cord or Kydex).
- Cummerbund/belt: single utility pouch for BBs, pyro, or a smoke grenade.
- Optional: dump pouch on support-side belt.
- Skip: a full hydration setup if you can resupply during breaks, and avoid oversized admin or utility pouches that only add bulk in tight spaces.
Woodland Skirmish (Walk-On Days)
The daily driver for most players: three to four hours, moderate pace, some room to breathe between engagements.
- Front: 3–4 rifle mags, admin pouch above or dangler below.
- Cummerbund: support side for dump pouch and radio; strong side for 1 spare mag and a small utility.
- Back: hydration bladder (2L is enough for 3–4 hours), IFAK patch on lower back.
- Belt (optional): sidearm + 2 pistol mags.
MilSim (Extended Play)
Long events, self-sufficient, role-based. A full plate carrier setup actually earns its weight in this format.
- Front placard: 3 rifle mags, quick-detach for reconfiguration.
- Cummerbund both sides: 2 more rifle mags, radio body, pistol mag pouch, utility.
- Back panel: 3L hydration bladder, teammate-accessible IFAK, sustainment pouch (meal, batteries, tools).
- Belt: pistol, 2 pistol mags, dump pouch, multi-tool.
- Consider: a role-specific helmet, dead-rag storage, map tools, or identification aids if your event format and site rules actually call for them.
Sniper / DMR
Prone shooting is the priority. A bulky front panel lifts your torso off the ground and makes you a bigger target above cover.
- Minimal chest rig with only 2–3 mag pouches on the sides, not centred.
- Centre chest: admin pouch for range card, spotter notes, wind indicator.
- Back: hydration, IFAK.
- Belt: more mags, pistol, tools, spotter gear if you have one.
- Goal: flat front, low profile, everything tucked so nothing snags on vegetation during crawls.
When MOLLE Isn't the Right Answer
MOLLE is brilliant, but it's not always the best option. If you're only playing once or twice a year, a basic fixed-pouch tactical vest costs half as much and works fine. If you only ever run three mags and a pistol, a chest rig with sewn-in pouches is simpler and just as effective. And for ultra-minimalist CQB or speedsoft, a micro chest rig with zero PALS webbing and dedicated mag slots actually performs better because there's nothing to snag. Don't buy into MOLLE just because everyone on Instagram runs it. Buy it when modularity genuinely solves a problem you have.
Common Mistakes That Ruin a Good Setup
After years of setting up kits, both my own and helping hundreds of players at Shogun.shop, the same mistakes keep surfacing. Avoiding these five alone puts you ahead of most players at any field.
1. Filling every PALS row. Modularity only pays off if you carry only what you actually use. An overloaded rig adds weight, heat, and snag hazards without improving performance. Start with the essentials from the priority list above, play a few games, and only add pouches when you notice a specific gap.
2. Mounting everything on the front panel. A front-heavy plate carrier makes prone shooting uncomfortable, tires your shoulders, and unbalances you on climbs. Use the cummerbund and back panel deliberately.
3. Ignoring the waist strap / cummerbund adjustment. A loose bottom lets the whole vest bounce while you run. Tighten the cummerbund first, then fine-tune the shoulder straps. The vest should feel locked to your torso, not hanging off it.
4. Hiding emergency or first-aid items where nobody can find them. Even in airsoft, the smart move is to keep essentials visible and easy to access. If you carry a first-aid pouch, don't bury it under other gear or place it somewhere awkward to reach.
5. Skipping the dry drill. Every new pouch placement changes your reload sequence. Run a few magazine changes, shoulder transitions, and prone checks at home before every event. You'll catch clashes, retention issues, and reach problems before they cost you on the field.
Maintenance and Inspection
MOLLE gear is durable, but it's not indestructible. A thirty-second pre-game check prevents 90% of equipment failures.
- Pull-test every pouch. Give each a firm tug outward before you head to the field. Something loose now becomes something lost during a push.
- Check webbing for fraying. If you see individual strands breaking, that row is compromised. Weave pouches into adjacent rows until you can repair or replace the panel.
- Inspect snap buttons. Plastic snaps degrade with UV exposure and repeated cycles. A snap that won't click or feels weak should be replaced before the next game.
- Wash it occasionally. Mud, sweat, and BB residue build up and wear the fabric. Cold wash, mild detergent, hang dry out of direct sunlight. Never tumble dry, because heat kills the PU coating and weakens the nylon.
- Store properly. Empty, loosely buckled, cool and dry. Don't compress a fully loaded vest in a tight duffel for months, because the webbing deforms and attachment reliability drops.
If a pouch starts wobbling mid-game and you don't have time to re-weave, thread a zip-tie or small length of 550 cord through the top and bottom attachment points. It's ugly but it holds the pouch until you can re-weave properly at home. Keep two zip-ties in your admin pouch, because they fix almost any gear failure on the fly.
Frequently Asked Questions
Does MOLLE gear fit any brand of pouch?
Usually yes, as long as both the pouch and the platform genuinely follow the PALS standard. Mixing Warrior, Condor, 8Fields, Emerson, and similar brands is very common in airsoft. The main exceptions are older proprietary attachment systems or some tighter laser-cut panels where fit can feel less forgiving.
How many rifle magazines should I carry for airsoft?
For most walk-on games, 3 to 4 magazines plus one in the gun is plenty, giving you around 400 to 600 BBs of ready ammo if you run mid-caps. CQB can get by with 3; woodland skirmishes benefit from 4; MilSim usually wants 5 or 6 because resupply is restricted. Snipers typically carry 2 to 3 because bolt-action rifles fire slowly. Capacity also depends on the platform. See our airsoft rifles and replicas category for mag compatibility per model.
What's the difference between MOLLE and PALS?
MOLLE is the broader equipment system (the pouches, packs, carriers, and accessories together). PALS is specifically the webbing grid that makes MOLLE work. Everyone uses the terms interchangeably, and that's fine for practical purposes. If you ever read technical specs, PALS refers to the ladder of stitched webbing, and MOLLE refers to anything that attaches to it.
Can I use ALICE clips on MOLLE gear?
Technically yes, but you shouldn't. ALICE clips are metal slide keepers designed for an older webbing system; they don't weave through PALS webbing and tend to sit loose or slip free under movement. Sewn-in MOLLE straps, MALICE clips, or modern alternatives like WTFix straps are all more secure.
Should magazine pouches be open-top or flap-closed?
Open-top with retention (shock cord or Kydex insert) is faster for reloads and the standard for airsoft. Flap-closed pouches are more secure for running and climbing but cost you half a second per reload. Most players run open-top on the front panel and flap-closed for reserve mags on the sides or back.
How tight should a plate carrier be?
Snug enough that the carrier does not shift when you run, loose enough that you can breathe deeply and rotate your torso. A good test is to raise both arms above your head and shoulder your replica a few times. The carrier should stay stable without pinching your shoulders or bouncing around your midsection.
Do I need a battle belt on top of my plate carrier?
Not necessarily, but it helps. A battle belt frees your plate carrier from having to carry a sidearm, pistol mags, dump pouch, and tools, moving that weight to your hips where you carry it more efficiently. For longer games or role-based play, the chest rig + battle belt combination is one of the most popular setups in the community.
Bringing It All Together
A good MOLLE setup is built in layers: the right platform, a plan before weaving, correct technique on every strap, pouches placed by priority zone, and weight balanced around your body. Skipping any one step is the difference between a rig that disappears when you're playing and one that nags you every minute. Set it up once the right way and you won't need to think about it again for a long time.
Worth saying out loud: your first setup probably won't be your final setup. Play a few games, pay attention to what you actually use and what you never touch, and adjust. MOLLE exists precisely so you can keep tuning your kit as your playstyle develops. Don't be afraid to re-weave. That's the whole point of the system.
At Shogun.shop we stock a wide range of tactical gear and equipment, including plate carriers, chest rigs, MOLLE pouches, belts, and everything else you need to build a loadout, from trusted brands like Warrior Assault Systems, Condor, 8Fields, and Emerson. If you're not sure where to start, drop by the store or message us. We've been helping Dutch and Belgian airsoft players build loadouts for over a decade, and we'd rather spend ten minutes sorting your setup than have you buy the wrong kit twice.
Good luck out there. See you on the field.
Sources and Further Reading
- U.S. Army / Natick development references and historic overview material on MOLLE and PALS.
- Wikipedia: MOLLE and Pouch Attachment Ladder System.
- 5.11 Tactical: How MOLLE Works.
- Patrol Base UK: How to Mount MOLLE Pouches.
- T.REX ARMS: How to Install MOLLE Accessories.
- Midwest Armor: The Complete MOLLE and PALS Guide.
- Novritsch Blog: How to Set Up Your Airsoft Plate Carrier.
- Redwolf Airsoft: Airsoft Plate Carrier Setup Guide.
- De Airsoftwinkel: Airsoft plate carriers, een tactical gear must-have?.